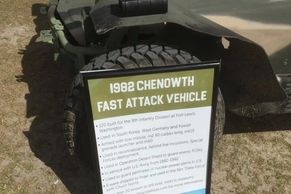
My FAV build Start to Finish

I looked for a real Chenowth Fast Attack Vehicle for many years before finding this one. I was hoping to find an original running example but was willing to buy one in ANY condition.I found a few over the years but they were a lot more money than I could afford. There were also a few fakes made from real Chenowth chassis but lacking the heavy duty equipment used to build the FAV. I would only accept a real FAV. Earlier this year my search finally came to an end when the owner called me and said it was mine. One week later it arrived at my home and the work began. It was missing the engine, transaxle, rear basket, lights and a few small items. What was there needed a complete overhaul. I have been restoring cars all my life so this won't be a problem. Here are some photos of the restoration so far. I will add more photos as I progress.
It was almost consumed by the local vegetation
But looked pretty good from 20 feet. It was in sad shape but I liked it!
The day it arrived at my home in Florida. It was all by itself on a 10 car transporter.
No engine, no transaxle, no rear bumper, no rear basket, no lights. Didn't matter. IT IS A REAL CHENOWTH FAST ATTACK VEHICLE!
The seats needed a little help but the full set of VDO gauges were there and so was the military light switch and the custom fuel tank.
The first thing to do is vacuum 50 pounds of sand and dried palm fronds from the floor of the FAV. This one has been to the desert. The sand filled a large shopvac.
Next came 4 new offroad tires, a rebuilt 6 rib Bus transaxle, new CV joints, boots, Clutch slave cylinder, throw-out bearing and a new starter.
6 Rib transaxle mounted with new throwout bearing. Notice the 24 volt isolator and control box with military grade wiring, heavy trailing arms, external oil cooler and filter. It also has 3 shocks on each side.
The axles, special air filters and oil cooler were there but all would need to be repaired or replaced. Something heavy fell on the air filter box and will need some work.
Next came the motor. I had a 1915CC stroker motor and added a 8 dowel lightened flywheel, Kennedy clutch and pressure plate, large oil sump, big valve heads, electronic ignition, EMPI Weber type carb and intake, a new high capacity fan and a new alternator, just like the original motor had.
New fuel pump, oil filter and lines, Bosch coil, plugs and wires, offroad fan shroud.
And the last part was the EMPI Sandrail exhaust. It was ready to run.
New tie rod ends, brake cylinders, brake shoes, inner and outer bearings, seals and had the drums turned.
Front end finished.
The rear brakes needed a full overhaul
The bearings were good so they got a good cleaning a repacked with grease. Note the 5x5 rear trailing arm and CNC bearing carrier.
New shoes, wheel cylinder, axle seal and gaskets. Rear brakes are ready to go.
The drums were like new. Note the pressed-in wheel studs versus smaller lug nuts that were stock.
New brake master cylinder, clutch master and slave cylinders, brake lines and gas pedal. Brakes, clutch and throttle rebuilt and working.
Ran into a problem with the stroker 1915 motor. It developed a knock. I wasted a couple weeks putting a second stroker motor together only to find a problem with that motor too. Decided to put a stock motor in it for now just to get it driveable. So far so good. Driveline complete.
After tearing down the original stroker motor I found that one cylinder had been machine too much for the 82mm crank (stock is 69mm) and the top of piston #2 was hitting the cylinder head. Ordered some shims and will install them later. Motor should be ok after I put it back together.
Luckily the original custom designed and built aluminum fuel tank came with the car. No idea where you could find another one like it. I added some rubber rollcage foam to the support bars just as a precaution again the tank rubbing the supports. I did not have the tank mounting straps so I used a nice set I had from a 1957 Chevy wagon. They fit perfectly. I added an electric fuel pump as well.
Seems like it's 2 steps forward 5 steps back.
Not having a wiring diagram has made it a bit of a challenge as I test every wire in hopes of discovering its purpose. Throw another impossible thing to find in the mix i.e. the "Engine Protection System" and you have many single points of failure. Also, there is no fusebox, just 2 military grade circuit breakers for the whole system!
This is the back side of the EPS. It Looks fried.
Finally bypassed the EPS and the engine starts normally thru the military switch. 1 item off the checklist.
Next is the new NOS headlight switch I bought on Ebay from Greece. It was new in the original box and had a build date in 1978. Exactly the correct part for my FAV. I received it yesterday so installing it today then trouble shooting the lights. Almost 40 years old and still in box! It looks great in the FAV and a test showed there is no short anymore. Another problem solved.
The NOS box the switch came in. New in March 1978.
I only had one front light bracket and none for the rear so I built my own from scratch. I think they came out ok.
Original front light bracket on left. Other 3 are the brackets I fabricated out of aluminum.
I bought a used set of lights from a M151 and a NOS pair of IR lights I am converting to headlights. New brackets and all lights mounted now. Starting to look like a FAV.
Now that the new light switch is in and the crazy short is gone I can start identifying the wires for the lights. Should be fun.
Spent a whole day tracing 34 wires down. The harness is basically a M151 and most of the wires were numbered and all the "M" series vehicles used the same numbers but after sitting outside for 20 years, most of the numbers had worn off. I managed to get the running lights, turn signals, brake lights, headlights (hi and low beam) and the blackout lights working. The only thing left is the backup lights but that harness was cut so I have to find it and replace it. I also found the horn wire so a new horn was ordered.
JANUARY 18, 2017 - First time running the motor and driving it up and down the driveway. Brakes are still not right. I think it is the cutting brake. Runs and shifts great! The last time this car ran was 30 years ago!
During the test drive I noticed the brakes were not working well. Over the next 2 weeks, once again, I bled the brakes, adjusted the shoes, tightened all the line fittings and still no brakes. I had to pump them 3 or 4 times to get any hold. narrowed it down to the Neal cutting brake so I bypassed it and bled the brakes. Still no brakes. Next I added a Wilwood residual valve then bled the brakes. No change.
The only thing left was the hydraulic park brake. Installed a new one and finally.. BRAKES!
After I welded in some new supports on the original seat frames I sent them out to a local auto upholstery shop and had them recovered. I went with real OD Army seat material and they came out great. They have that wonderful smell of a WWII tent.
My FAV came with the unique 3 piece air cleaner system but all 3 pieces were bent. I pulled and hammered most of the dents out so now it looks ok. I could have bought new parts but I am trying to keep as many original parts as possible.
When the original engine was pulled out years ago the adapter plate that goes between the Weber carb and the custom intake box was lost. I fabricated a new one and it works really well.
The frame on my FAV was in pretty good shape when I got it but the body needed some help, especially the nose. There were big cracks on each side, probably where the body hit the frame. Some fiberglass work over a couple days fixed it back to original.
I won't have time to go thru the DMV process to get my FAV registered and tagged before the big Military show. I decided to put a tow bar on it and tow it to a couple shows first. I had to fabricate some steel mounts and they are strong and look ok. A little OD paint and it should be good to go.
I wanted to keep all of the original id numbers and soldiers names that were on the body so I taped them all off and started painting using the original pattern as a guide. I think it turned out pretty good and I am calling it DONE!
The last thing to do before the show is mounting the weapons. I have a M60, M2 50 Cal and a M72 LAW. My plan is to mount the M2 on the top bar, the M60 in the #2 seat position and the M72 somewhere else on the chassis. I already mounted the Smoke Grenade launcher and a couple 7.62 ammo boxes in the side basket. I will mount a couple 50 cal ammo boxes when I get them. I might have a M16 coming before the show so I will need to fab up some kind of mount for that too. This is how it looks with the M60 and M2 mounted. These are temporary until I get time to do it the right way. The M2 came from Mac System Replicas in Tennessee. It is an excellent 50 cal replica and is metal, not resin. For the money, this is the best show-quality M2 on the market. They do great work!
I mounted the M72 LAW on the back roll bar and installed the antenna mount and antenna. Almost ready for the show!
I added a little Thank You to the 9th Infantry Division
A milestone today Feb 12. Hooked the Fav up to my 30 year old Suburban and took it for a test tow. Took it about 8 miles in low and high speed and it towed great! The tow bar and brackets worked like they should so it will be ready to be towed to the show in 9 days. I just couldn't resist starting it up and driving it around the neighborhood a couple times. I had a HUGE smile on my face!
Just a few small things to do before our Annual Military Show Feb 22-26 at Renningers Market in Mount Dora Forida. To see more about the show go to www.flmvpa.org and click on the 2017 Rally Flyer on the left. You can also see photos from our show last year by clicking on the link on the right.
I have less than a week to finish getting the FAV ready for the show. All I have left is a long list of "Little Stuff" to do. Today I mounted a ammo bag on the M60 and added a foot of 7.62 spent ammo. It came out pretty nice. Also put a foot long link of 7.62 in a 1988 original bandolier and displayed it and a couple 7.62 ammo boxes on the FAV. I also found a FAT 50 caliber metal ammo box and modified it to fit the M2 mount. Looks like it belongs there. By Saturday I should have a nice set of 50 caliber armor piercing (AP) rounds and links for it.
This makes the M2 look GREAT! .50 caliber armor piercing ammo!
I did a few more "little things" on my FAV today. It is Sunday evening... 3 days before our Annual Military Vehicle Show and I am calling it DONE! It is ready and so am I. It isn't finished though. I want to make a few changes to the weapons mounts and I still have to fabricate the rear basket and headlight covers. But... it will be fine for the show. I hope there are a few Veterans from the 9th ID at the show. I will give them a ride on the trails and to the 9th ID Veterans who could not be at the show (you know who you are...) I will take a special run thru the sand boggs in honor of the Old Reliables!
A couple photos of my FAV at it's first show.
The FAV's first show was really great. 118 Military Vehicle were there and it won a Top Ten Award. Not bad for the first time out. I took my son Dave, my Friend Bob, a fellow FAV owner Jim and my Grand Daughter Greta for rides in the trails. Dave and I also took it on it's first parade. It is crazy fast and a blast to do donuts at full throttle!
I finally got insurance and a new "Former Military Vehicle" tag for my FAV. It passed the DMV inspection first time and I have taken it for several drives on the local roads. It sure does draw attention. I installed a lexan windscreen that I can quickly remove without tools. I can take it off at events and parades so I can mount the M60 in the #2 position then put it back on when I drive it home. I decided to leave the M2 50 cal mounted all the time and just keep it covered. That might change if I start getting pulled over by the police. Driving it to a local car cruise tomorrow. Should be fun.